Wednesday, August 24, 2011

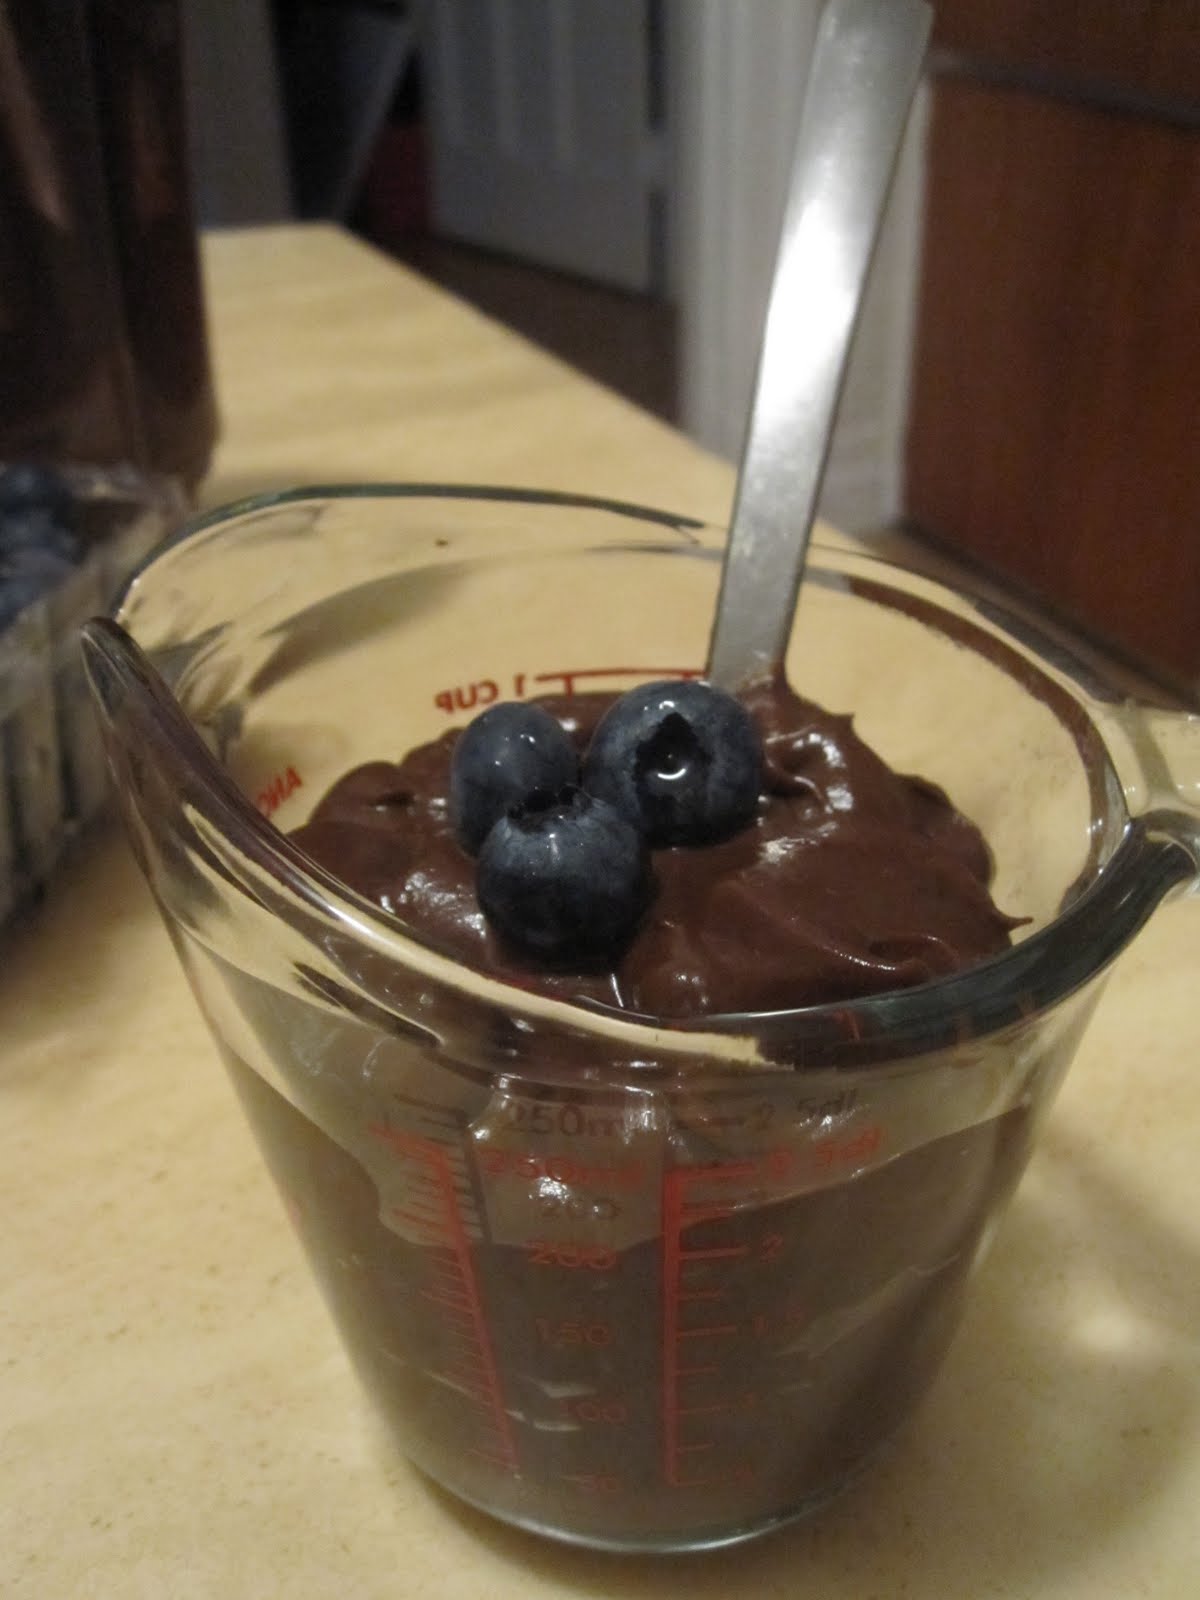
Avocado Chocolate Pudding

I am well aware that the concept of mixing avocado and chocolate together might repel a few of you away from this blog entry. Nevertheless, I have built up the courage to share this beneficial dessert option.  My brother’s wife was kind enough to introduce me to this healthy chocolate pudding alternative without sacrificing taste or texture. Let’s face it, the reason we eat pudding is for the rich, silky smooth flavors that easily satisfy every chocolate lovers’ taste buds.

Now for some convincing! In case you haven’t already skipped down to the recipe, avocados are available year round and easily accessible at your local supermarket. I prefer purchasing them at Farmers’ Markets as you can purchase them for next to nothing, and they are usually ripe for the picking. Their creamy texture has given them the top spot in my books for culinary versatility. Not to mention that they are packed with fiber (keeping you fuller longer), vitamin E, and antioxidants that will keep those pretty eyes of yours protected. So instead of grabbing a snack-pack pre-packaged pudding, why not give this choco-avocado delight a try?

Xo Dom Appetit!

PS. this recipe makes about a cup, but after 3-4 tablespoons your craving will be satisfied!


Avocado Chocolate Pudding
Prep Time: 10 mins

Tools needed: small smoothie blender (or food processor), measuring spoons and cups, cutting board, paring knife

Ingredients:
2 ripe avocados (pitted and peeled)
4 tablespoons of cocoa
3 tablespoons of honey
2 tablespoons of water

Directions:
1)  Pit and peel avocados and throw into blender. Add water, cocoa, and honey. Blend until all items are smooth (you can add more honey to make it as sweet as you please!)


Monday, August 22, 2011

Edamame Succotash

This past weekend I made a promise to myself to be more proactive with my cooking and overall health. This could have been triggered by a Saturday night binge including a slice of 99 cent pizza, terrible Chinese take-out, and PC’s new pepperoni pizza bites with garlic dipping sauce (not the wisest choice). My grand idea of Sunday detoxification from those nightmarish calories included 90 minutes in the torture chamber of Bikram Hatha Yoga. For those of you who are not familiar with this practice, let me fill you in. Picture this: holding 26 different positions for two minutes at a time in a 40 degree room, with no way out. Our instructor, who has the tightest abs I have ever seen, mandated that we were not to leave the room at any point during the class. Her explanation, “to not disturb the others’ practice”. I reckon, it is much safer to have my sister and I feeling roller coaster nausea, near black out state, begging for this moment to end… and yes, I will be returning tomorrow for round two.

After experiencing this toxin releasing stretch-fest, the last thing I could think of is putting more junk in my body. I was craving something refreshing without sacrificing any taste. So I quickly filtered through my latest copy of the Food Network mag, and stumbled across this amazing Edamame salad recipe. It includes my favourite fresh veggies: corn, red peppers, red onions, and ….Applewood-smoked bacon. Ok, I know that it is a bit of a cheat, but it adds such amazing flavour to the mix and can be substituted for chicken or turkey bacon. Now for the nutritious side, the Japanese Edamame bean is packed with protein, high in fibre, omega-3 fatty acids, and above all, is loaded with flavour. Don’t be afraid to add any extra ingredients to this perfect side dish and call it your own.

Xo Dom Appetit!


Edamame Succotash

Taken from: The Food Network
Prep Time: 15 mins
Cook Time: 5 mins
Tools Needed: measuring cups and spoons, large skillet, cutting board, paring knife, spatula

Ingredients:
2 tablespoons of toasted sesame oil
½ cup finely diced red onion
1 teaspoon of minced garlic (I chopped 3 garlic cloves! Delish!)
2-3 strips of applewood-smoked bacon, finely chopped (1/3 cup)
1 cup of frozen Edamame (thawed)
½ cup of fresh corn kernels, from 1 small ear
¼ cup small-diced red bell pepper
Salt and freshly ground white pepper

Directions:
1)      In a large skillet, heat the sesame oil over medium heat. Sauté the onions and garlic until softened (2 mins). Add the bacon and cook until it begins to crisp (5 mins), drain some of the fat.
2)      Add the Edamame, corn and bell pepper and sauté for 2 to 3 mins. Season with a dash of salt and pepper. Remove from heat and serve hot. Makes about 2 cups.


Tuesday, August 16, 2011

Apple Dumplings

When I think dumplings, Sunday Dim Sum always comes to mind. Dim Sum brunch is a mix between a la carte and buffet style cuisine and is always a memorable quest. You enter the event starving and greedy for any and all treats hiding in each bamboo basket presented to your table. The hustling of the elder Asian women pushing their goods onto your table is a scene everyone must experience. They possess unbelievably competitive drive. I often wonder, are they on commission?! Nevertheless, they provide you with the comfort of fried or steamed dumplings that leave you overly satisfied, wishing that you stopped after that first serving. A lesson that is never learned…

This dumpling recipe is a bit unconventional as it includes fruit and a splash of mountain dew. Yup, I made a double take on this ingredient as well. Pop on apple dumplings? What an absurd idea...I had to try it. I still feel a bit uncomfortable with the fact that I drenched my dessert with soda, but the aroma filling my home begged to differ. The sinful cinnamon scents twirled around my kitchen as the dumplings crisped to a light brown gold, releasing the sweet, slightly tart taste of apples. Not calorie wise, but well deserved, and as simple as it gets.
Xo Dom Appetit!


Apple Dumplings
Adapted from: Apple Dumplings (I split the recipe in half! Makes 8 delicious dumplings!)

Prep Time: 10 mins
Cook Time: 35 to 45 mins

Tools Needed: 9 x 13 baking dish, cutting board, measuring spoons and cups, paring knife, small saucepan, wooden spoon

Ingredients:

2 large granny smith apples sliced thinly (peeled and cored)
1 can of crescent roll dough (pillsbury)
1/2 cup of butter
3/4 cup of white sugar
1 teaspoon of ground cinnamon
1/3 can of Mountain Dew

Directions:

1) Preheat oven to 350 degrees F. Grease baking dish
2) Seperate crescent roll dough into triangles. Roll thinly sliced apples in crescent roll dough starting at the smallest end. Pinch to seal and place into baking dish
3) Melt butter in a small saucepan and stir in cinnamon and sugar. Pour over the apple dumplings. Pour the Mountain Dew over the dumplings and bake for 35 to 45 mins (until golden brown)

Tuesday, August 2, 2011

Gazpacho with Avocado Toast

It has become an exhausting feat, to cool down in this sweltering heat. But I refuse to complain, as I have been waiting eight long, dispiriting months for these scorching sleepless summer nights. I am one of those few unfortunate souls living in North America that does not own an air conditioner. To make matters worse, I live in a particularly sketchy neighborhood where opening my window at night is not an option. One can only imagine what my kitchen must feel like…

This is why for dinner this evening, I resorted to a refreshingly, light Gazpacho to be enjoyed in my plus 40 degree apartment. For those of you who are not familiar with Gazpacho, I believe it is about time that you get yourself acquainted! It is a simple tomato based soup with raw chopped vegetables (cucumbers, red peppers, tomatoes, coriander, garlic, red onions). Despite its lack of depth, this cold soup is full of flavor and nutrients. Its origins are said to be from Spain, but you may recognize this tasty soup from many Italian menus. The soup only gets better with age, so be sure to let it sit a day or two in the fridge to allow the ingredients to unify. I suggest serving this with freshly baked sunflower and flax seed bread topped with fat slices of avocado. Don’t forget to sprinkle with salt.

Xo Dom Appetit!

PS. Why not spice it up by adding chopped jalapeno for that extra bite? Just don’t forget a dollop of sour cream to cool things down!


Gazpacho


Prep Time: 20 mins

Tools Needed: large mixing bowl, food processor, large mixing spoon, measuring cups and spoons, cutting board, knife
Ingredients:

1 cucumber (halved, do not peel)
2 red peppers cored and seeded (I used 1 orange pepper)
4 tomatoes
1 medium red onion
3 garlic cloves, minced
3 cups of V8 tomato juice (low sodium)
¼ cup of white wine vinegar
¼ cup of good olive oil (I used my lemon infused olive oil from Sorrento!)
½ tablespoon of Kosher Salt
1 teaspoon of freshly ground pepper

Directions:
1)      Roughly chop the cucumbers, bell peppers, tomatoes, coriander, and red onions into 1-inch cubes. Put each vegetable separately into a food processor fitted with a steel blade and pulse until it is coarsely chopped (make sure to not over process)
2)      After each vegetable is processed, combine into large bowl and add garlic, tomato juice, vinegar, olive oil, salt and pepper. Mix well and ensure to chill in fridge before serving. Like I mentioned above, the longer it sits, the better.  


Thursday, July 28, 2011

Housewives’ Chicken in White Wine and Vinegar

My colleagues surprised me yesterday with a belated B-day gift (yes, my birthday is typically a week-long event) and I was quite impressed with their choice of purchase. They presented me with the most appealing rustic Italian cookbook titled: Two Greedy Italians {you might recognize them from their sitcom on BBC}. It was such a genuine gift that I had to take the night off and browse through every single colorful recipe.  There is something exciting about two traditional, authentic, brawly Italian men, creating full succulent simplistic meals (within minutes), that appeals to almost anyone’s appetite. 
 
One recipe that really caught my eye was the Housewives’ Chicken in White Wine and Vinegar. Despite the sexist connotations behind this title, the minimalism of the ingredients was just what I needed for the night. The results were quite surprising considering the lack of effort on my part. The chicken was extremely juicy and tender. It literally melted off the bones with a light citrus flavor allowing the cloves and peppercorn to shine through. The origin of this recipe (per our big boy authors), is that “housewives” would combine all the ingredients to marinate in the morning and leave to go work in the fields all day….only to come back home and serve this no fuss flavorful meal to their loving husbands and children. These women seemed to do it all, and almost certainly the dishes too. Well, times have definitely changed! Goodbye field working wifey’s and welcome the Real Housewives of Orange County!

Xo Dom Appetit!

PS. Serve this on a bed of jasmine rice! Yum Yum!


Housewives’ Chicken in White Wine and Vinegar

Taken from: Two Greedy Italians

Prep Time: 10 mins
Cook Time: 50 mins ( I let mine cook for 1.5 ours…)

Tools Needed: large skillet and lid, cutting board knife, measuring cups and spoons
Ingredients:

1.2 kg of chicken pieces (I used legs and thighs, brown meat is the juiciest!)
600 ml of white wine
3 tablespoons of white wine vinegar
2 shallots finely sliced
2 carrots roughly chopped
1 celery stalk roughly chopped
4 bay leaves
1 green onion
2 cloves
10-15 peppercorns
40 g of butter
4 lemon slices
Salt
Directions:

1)      Place all ingredients into a large saucepan or casserole. Bring to a boil, lower the heat and cover with a lid, but not completely, so some of the steam can escape. Cook gently over low heat for about 50 mins, turning halfway through, until the chicken pieces have cooked through and are golden brown on all sides and the liquid has been absorbed. Remove from the heat and serve with rice.

Wednesday, July 27, 2011

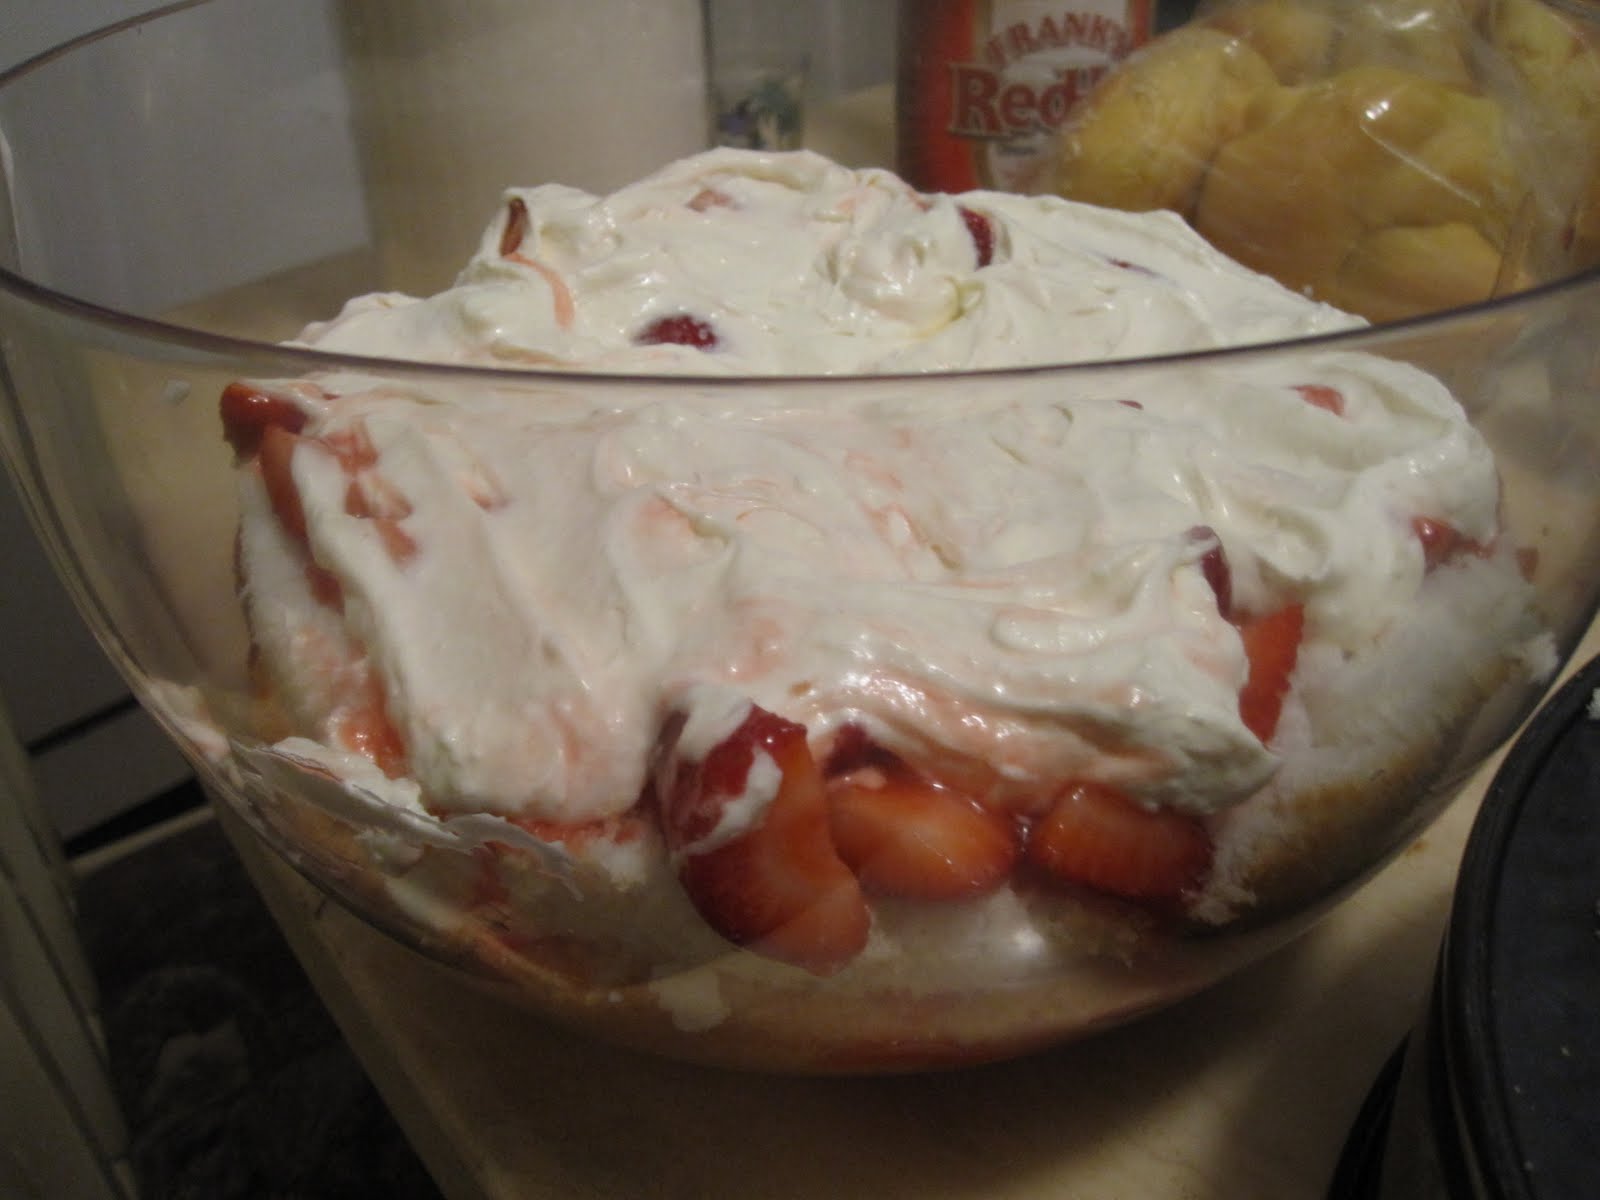
Dreamy Strawberry Shortcake

Last weekend was my birthday and I was fortunate enough to spend it with my closest friends and family. I felt like I was six years old again, being overly spoiled with attention and copious amounts of energy not knowing who to turn to first.  I also indulged a bit too heavily in four extremely rich cakes and plenty of unnecessary greasy finger foods. But, I am happy to share with you that I finally received the juicer and bread maker I had been begging for (stay tuned for some fresh bread recipes)! Most ladies my age ask for lavish jewelry or spa days, but I’ll almost always prefer nicely gift wrapped luxurious kitchen appliances.

Just in case I didn’t greedily devour enough sweets this weekend, I decided to put my leftover strawberries to good use and bake up a dreamy, extra creamy, Strawberry Shortcake. Of course, I had to go big or go home, and pick a recipe by Paula Deen, the Queen of rich, calorie-ignorant desserts. This recipe not only calls for the usual ultra whipped cream, but also daringly adds sweetened condensed milk and the unforgettable, delightful taste of cream cheese. I am warning you now; this dreamy cake should only be made if you are ready to appreciate it fully, for what it is and not for what it isn’t (it ain’t low fat, low cal, no taste, no guilt! lol). It would probably be best to share this one, spoons first with the ladies! Enjoy!

Xo Dom Appetit!


Strawberry Shortcake
Prep Time: 15 mins
Cook Time: 5 mins
Tools Needed: medium mixing bowl, medium saucepan, measuring cups and spoons, cutting board, knife, big clear bowl, spoon, electric mixer, rubber spatula, serenated knife,
Ingredients:
1 large Angel Food Cake (bought or homemade)
Custard:
1 package of cream cheese
1 can of sweetened condensed milk (small one)
1 container of frozen whipped topping (thawed)
Glaze:
1 cup of sugar
3 tablespoons of cornstarch (or flour)
3 tablespoons of strawberry gelatin (recommended: Jell-O)
1 cup of water
2 cups of fresh strawberries, cut in 1/2 (keep some strawberries for garnish!)
Directions:
1) Slice cake, using a serenated knife, horizontally into 3 equal layers
2) Custard: mix together cream cheese, condensed milk, and whipped topping in a bowl. set aside
3) Glaze: in a medium saucepan, stir together sugar, cornstarch, and gelatin; add water. Cook stirring over medium heat until thick. Remove from heat and allow to cool completely, then fold in strawberries
4) Place one layer of the cake in a large clear bowl. Top with a layer of glaze, followed by a layer of custard mixture. Repeat layering in this order for remaining cake, glaze and custard. Top cake with whole strawberries and enjoy! Refrigerates Well :)

Thursday, July 21, 2011

Shish Taouk- Adonis Style!

All of you who shop at Adonis know how tasty their Shish Taouk chicken is. There is nothing like it. You probably also know how exclusive their recipes are and that this recipe is nearly impossible to find anywhere, even on the World Wide Web. It’s a savory garlic yogurt sauce marinated chicken cult and only those privy to this information are fortunate enough to share this very classified dish at their table. Sadly, even I could not obtain this sacred authentic Mediterranean recipe. I was now determined to find anything that would be remotely equivalent to the famed Adonis Shish-Taouk style chicken. 
After sitting with a few fellow S-T fans, I was proficient enough to put together an adequate recipe attempt that blew me away and fulfilled my appetite. I am convinced that any Adonis S-T fan would approve of this succulent garlicky BBQ’d chicken and gobble it down in 1 or 2 pitas…not forgetting the tomato and cucumber side salad (which is the essential ingredient to completing this trio). Oh, one last thing… make sure you have breathe mints nearby as this marinade calls for 8 garlic cloves! The more the tastier I always say!
Xo Dom Appetit!

Chicken Shish Taouk
Prep Time: 15 mins (at least one hour to marinate)
Cook Time: 25 mins
Tools Needed: large mixing bowl, cutting board, knife, measuring spoons and cups, saran wrap, spoon, fork, BBQ thongs
Ingredients:
16 boneless & skinless chicken thighs
½ cup of olive oil
8 garlic cloves mashed (the more the tastier)
350 ml of plain yogurt
2 tablespoons of white vinegar
1 teaspoon of dried oregano
1 teaspoon of dried thyme
1 tablespoon of fresh lemon juice
Salt and Pepper
Directions:
1) Prick the chicken with a fork and put it in large mixing bowl. Add all other ingredients and mix. Let marinate in the fridge for at least one hour (tastes best if left in fridge overnight).
2) Add to BBQ over medium heat and cook for 25 mins, turning every 5 mins. Check if cooked by cutting a slice in the middle ensuring that chicken is well done. Serve immediately with a pita and side salad