Monday, February 28, 2011

Chocolate Brownie with Raspberries and White Chocolate Chips and…Butternut Squash!

I was sitting on the couch, sipping on some green tea while watching the Food Network (my usual Saturday morning routine), when I saw the best dessert idea ever: Brownies made with Veggies!? The ladies from the show Cooking Yourself Thin were trying to help some adorable chubby girl lose weight for her wedding, by taking her fave foods and giving her healthier options. This one really caught my eye, as I am HUGE brownie fan (duh!) and was literally praying for any solution to this addiction. Seriously gang, if I had a Juliette et Chocolat behind my house I would be eating their Salty Caramel Brownie every day. They have the most deliciously moist brownie I have ever tasted…until now.
I know it sounds weird, but I am telling you this brownie is finger lickin’ good! Picture a guilt-free brownie….that actually tastes good. It has every flavor a brownie should have: a strong cocoa flavor, sweet and tart raspberry taste, and moist squishy texture from the squash= PERFECTION. I want you all to know that I am not in fact biased as I had a number of people try them and they all freaked out on how amazing these were, not believing , and not wanting to hear that these chocolate delights are made with a vegetable. Bake up a batch of these bad boys and eat not only one slice, but two or three! We can finally afford the calories ladies, and if your men are squeamish about the idea….what they don’t know, won’t hurt them ;)
xo Dom Appetit!
PS. This was my first time making these, but next time I will try them with Blueberries and dark chocolate chips! Don’t be afraid to experiment!


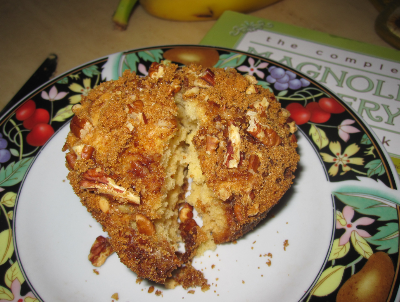
Et Voila! The ideal Guilt-Free Brownie!

Chocolate Brownie with Raspberries and White Chocolate Chips

(taken from: Cooking Yourself Thin Recipes)


TOOLS NEEDED: a square brownie tin (9 x 9), hand held electric mixer, measuring spoons, measuring cups, spatula, parchment paper, big mixing bowl.
Preparation time: 20 minutes
Cooking time: 30 minutes

Makes: 9

INGREDIENTS:


1 cup of Raspberries (or any berry of your choice!)
2 cups of cooked mashed Butternut Squash
2 handfuls of White Chocolate Chips
1 cup of ground Almonds (powder)
1 ¼ cups of white sugar
3 medium eggs
¼ cup of self-rising flour (to make this, we experimented by taking a bit less of ¼ cup of flour and adding ¼ teaspoon of baking powder and a dash of salt! Worked for us…)
½ cup of Dutch Processes Cocoa Powder
1 teaspoon of baking powder
¼ teaspoon of salt
1 tablespoon of Dutch Processed Cocoa Powder to top off the brownies (optional)

DIRECTIONS:

  1. Preheat the oven to 400 F
  2. Line backing tin with parchment paper, putting a bit of oil in the corners
  3. Beat the eggs and sugar in the big bowl until they have quadrupled in size and are pale and fluffy
  4. Beat in the squash, flour, almond powder, cocoa powder, salt and baking soda. Make sure well mixed and no clumps!
  5. Pour half of the batter in the tin and add the raspberries and white chocolate all over the mixture. Cover with remaining mixture. Place in oven and cook for 30 mins. Check with toothpick, if comes out a bit crumbly, then your brownies are ready! Leave to cool for 20 mins, sprinkle with cocoa and serve! J

Sunday, February 27, 2011

The Wonderful World of “Magnolia”: Sour Cream Breakfast Buns

Yes, I am blogging about the one the only, Sex and the City's fave cupcake shop, Magnolia Bakery (Manhattan, NY). And, it is definitely as fabulous as it was described to be. The beautifully stacked cupcakes and icing smothered cakes stare at you quietly whispering “eaaaaaaaaaaat me”. Once you have inhaled that buttery sweet smell, you will be walking out of there with a dozen cupcakes, easily. After scoffing down three butter- cream vanilla and chocolate cupcakes (I even dabbed a wet finger to make sure not to leave any crumbs behind), I noticed that Magnolia was offering a cookbook of all their famous recipes. Seriously? Yes, I tell you! Magnolia had finally decided to reveal its scrumptious secrets to the world, and most importantly, Hungry Brownie’s kitchen.
I have made it my mission to bake at least one sweet delight from this book every two weeks. I would do more, but let’s be realistic; I don’t want to be walking around with cottage cheese thighs this summer, and I am sure none of you would want to see it either! Oddly enough, my first choice of the many options, were the Sour Cream Breakfast Buns. The smell of these cinnamon and sugar covered moist breakfast buns will fill your home with a soothing comfort. Make sure to eat these pups when they are warm straight out of the oven with a cup of chai tea.
xo Dom Appetit!


Sour Cream Breakfast Buns
Prep Time: 25 mins
Cook Time: 20 mins
Tools Needed: deep muffin pans (2-3 makes 18 buns), 3 mixing bowls (1 small, 1 medium, 1 large), electric mixer, sifter or whisk, large spoon
Ingredients:  
BUN:
3 large eggs at room temperature
3 cups of all-purpose flour
¼ cup of unsalted softened butter
1 ½ cups sugar
1 ½ teaspoons of baking soda
1 ½ teaspoons of baking powder
1 ½ teaspoons of vanilla extract
1 ½ cups sour cream (hmmmm…life without sour cream would not be worth living!)
TOPPING:
1 ½ cups of firmly packed light brown sugar
2 cups of coarsely chopped pecans
2 teaspoons of cinnamon
Directions:
1) Preheat oven to 350 degrees and grease your muffin pans (with pam, or the ol’ fashioned way: butter!)
BUNS:
2) In medium bowl sift/whisk dry ingredients (flour, baking powder, baking soda), set to the side
3) In large bowl, using electric mixer, cream butter and sugar until fluffy, then add eggs one at a time, then beat in vanilla. Mix in the dry ingredients until all combined. Mix in sour cream and then scoop into muffin trays
TOPPING:
4) In small bowl, mix the brown sugar, pecans and cinnamon. Generously sprinkle on top of buns. Bake for 20 minutes and check with knife or toothpick to make sure the center is cooked. Remove, Cool, and enjoy J (makes 18 buns)

Saturday, February 26, 2011

Sweet Stuffed Pepps!

It’s that time of year again; seasonal affective disorder is hitting this little Montrealer hard. The winter blue’s are in full effect. I know that spring is just around the corner, but the below zero weather has yet to convince me. I am craving anything and everything, but trying so hard to hold back and think rationally about the situation. “Do I really need that big bowl of freshly baked meat lasagna with a thick meat sauce, smothered in melted cheese?” The answer is no guys (but it does sound tempting right now, doesn’t it?). My wallet and my belly cannot afford the repercussions of this feat.

This weather has forced me to find “healthier” but equally yummy options to satisfy my cravings. This is when I remembered the comforting feeling of a bright colored stuffed veggie in a light tomato sauce with a parmesan crust. Red, Yellow, Orange stuffed peppers are on tonight’s menu. There is nothing more heartwarming then the smell of sweet peppers broiling in the oven with a bubbling spiced tomato broth surrounding them. Try this easy recipe and let this little piece of Mediterranean heat lift your spirits until the warmth of Spring finds its way home. 
xo Dom Appetit!

Sweet Stuffed Peppers
Prep Time: 20 mins
Cook Time: 1hr
Tools Needed: cutting board, large frying pan, knife, 9 x 13 baking dish (x2), aluminum foil, spatula
Ingredients:
1 pound of lean ground beef (organic if possible)
8 peppers (red, orange, yellow)
1 medium onion (chopped finely)
5 garlic cloves (chopped)
3 cups of cooked brown rice
2/3 -1 cup of sour cream (optional…but a great option!)
1 green onion
1 tsp cayenne pepper, parsley, Worchester
1 tablespoon of canola oil
1 can of diced tomatoes
1 cup vegetable broth
Salt and Pepper to season
Parmesan (sprinkle as desired)
Directions:
1)      Preheat oven to 350 degrees F
2)      Cut peppers in half up right, through the stem without removing it and then gut them. Place them laying down with gutted section facing up in 9x13 baking dish. Pour half a cup of vegetable broth at the bottom of each dish, just enough to lightly coat the bottom of the peppers
3)      Fry the chopped garlic and onions in a large frying pan until translucent and browning, add the meat. Once meat has browned add all seasonings (cayenne, parsley, Worchester, salt and pepper) and can of diced tomatoes
4)      Add brown rice to mixture making sure it gets well coated and then add sour cream (keeping pan at medium/low heat), continue to stir. Add in green onions.
5)      Generously spoon mixture into each pepper and sprinkle with parmesan. Cover both dishes with aluminum foil and put into oven. Bake for  45-50 mins. Remove foil and then cook on high broil for 5 mins, until top of peppers have developed a light crispy crust. Remove from oven spoon juices from the dish on the peppers, cool and serve. Enjoy! J

Wednesday, February 9, 2011

I feel like…Beer Chicken Tonight! Beer Chicken Tonight! Beer Chicken Tonight!


I am sure you all remember that catchy jingle from those 90’s commercials for Chicken Tonight pre-made chicken sauce, and if you don’t then here’s a little look: Chicken Tonight Ragu. Catchy isn’t it? Well, I was feeling like Beer Chicken last night and decided to cook my full grain fed chick that I bought from the Jean Talon Market. If you have never been to the JT Market it is definitely something worth checking out. It is an indoor farmer’s market with wall to wall fruits, veggies, eggs and more. In the summer they extend their produce outdoors and sell fresh flowers and plants, which I am really looking forward to.
I have made Beer Chicken a few times now, but I believe that last night’s attempt was a real success. I stuffed my bird with the usual chopped onions and garlic and made sure to marinate it overnight in a ziplock baggy with a rub down of all my favorite spices. The next day when I removed it from the bag, the chicken smelt heavenly, and I couldn’t wait for the end result. I ran down to the little Dépanneur on the corner of my street and bought a can of Coors Lite to stuff up my bird. Now that just sounds plain dirty, but that’s exactly what you need to do. Make sure to take a couple sips of the beer before inserting into the bird as it needs room to boil once inside. The beer keeps the chicken from drying up, and adds moisture to the baking process while creating a crispy outer layer. The constant outflow of liquid will ensure a perfectly tender fall off the bone chicken with that delicious crispy skin that we all fight over. I served this moist tender chicken plate with a side of sautéed mushrooms with chives in balsamic with long grain brown rice. I promise that you will be flapping those arms and singing that jingle over and over after this meal!
PS. It doesn’t matter what kind of beer you use (ale or lager). Next time I will attempt with my favorite cola! Don’t be afraid to experiment…just don’t burn the chicken!
BEER CHICKEN
Prep Time: 15 mins
Cook Time: 1.5 – 2 hrs
Tools Needed: large mixing bowl, large ziplock bag, 8 inch pie pan, chopping knife, oven mitts
Ingredients:
5 LB Chicken (grain fed preferably)
1 small onion (chopped)
4 garlic cloves (chopped)
½ teaspoon of Cayenne Pepper, Black Pepper, Chilis
1 teaspoon of Salt, Roasted Red Pepper and Garlic Mix (Clubhouse), Thyme, Worchester Sauce
2-3 tablespoons of Olive Oil
1 can of beer (brand of your choice)
Directions:
1) Preheat oven to 400 degrees F. In the large mixing bowl rub down your full chicken with olive oil while adding all the spices listed above (cayenne, pepper, chilis, salt, roasted red pepper and garlic mix, Thyme, and splash of Worchester). Make sure to cover all grounds not leaving any of the chicken undressed
2) Stuff the chicken with the chopped garlic and onion and insert into the ziplock bag. Leave in the fridge to marinate over night
3) Empty half of a can of beer and stuff up the chicken rear. Make sure that the chicken is standing stable on the can and sit on the pie pan
4) Put into oven and cook for 1.5 – 2hrs, rotating every 25 mins
5) Let sit for 10 mins and then carve and serve! Dom Appetit! J

Beer Infused Chicken

Beer Chicken with sauteed mushrooms
and chives with balsamic and long grain brown rice

Thursday, February 3, 2011

Dom’s Chopping Block: Chez Suzette, Crepes & Fondues

Last weekend was our last shot to check out Igloofest here in Montreal, so my girls and I jumped on making this an opportunity to eat somewhere fabulous as well. Igloofest is an outdoor dancing festival held in Old Port, Montreal. They have many electro DJs spinning their beats while hundreds of bundled up Montrealers and out-of-towners dance the night away in their winter boots. We made sure to be there early, as the line ups build up around 8pm.  After buying our tickets we made our way to one of our favorite fondue restaurants, Chez Suzette on St.Paul Est. in Vieux Montreal, Quebec. Let me start off by warning you now: Fondue is not for everyone. You have to be willing to spend at least 2 hours of your time blabbing with others and cooking your food in a communal pot. It is expected that you may lose your piece of meat, veggies, or bread once or twice in that boiling pot, but that’s part of the fun! So make sure that you surround yourself with people that you can tolerate and clear your schedule, as there is no rushing with raw foods. Upon entering Chez Suzette you will be a tad thrown off with the size of its interior. From the outside it looks like a small modest Creperie, however once you have entered its warm doors, you will notice that this small and modest resto expands to three floors. It adheres to both large dinner parties and to the romantic couple. After reviewing the menu, the girls and I chose to share the Fondue for 2 plus 1. The Fondue for two includes a traditional cheese fondue, oriental fondue with beef, and chicken with an assortment of veggies. Also included was a wonderful chocolate fondue served with seasonal fruits, crepes and marshmallows. The set price is 74.99 for two and any additional person pays half of this price. We placed our orders right away with only one modification (at a small fee); we ordered the sundried tomato and fine herbs cheese fondue rather than the traditional. Nothing tastes better with melted cheeses than the tang of freshly chopped sundried tomatoes and herbs splashed with wine. This cheesy communal pot was served to us with two baskets of bread and chopped apples with grapes. We were scrapping the bottom before we knew it and my jeans were feeling a little snug. My one complaint would be that the bread was a bit dry; I am not a fan of dry stale tasting bread and would have opted for more fruits for dipping. Our empty cheese crusted pot was quickly removed and replaced by an Oriental Fondue accompanied by one plate each of beef and chicken mixtures with fresh veggies and several dipping sauces. I managed to squeeze their secret “sauces” recipe out of one of waitresses and was surprised at how easy these are to make: 1 - plain sour cream, 2 - sour cream with Italian herbs and garlic, 3 - sour cream with curry powder (yellow), 4 - mayo with ketchup, and 5 - spicy chipotle splashed with Tabasco. I must say…everything does taste better with sour cream (sorry to those who are lactose intolerant, you are really missing out!). After an hour of patient cooking, we were ready to explode and regretting having ordered the Fondue for 2 plus 1….until our greedy little eyes caught a glimpse of the chocolate fondue. This dark decadent melted chocolate delight was presented to us surrounded by mounds of fresh strawberries, pineapples, bananas, rolled crepe chunks and marshmallows. I was holding my belly crying as I dipped one fruit after the next in this bitter-sweet mixture. My girls and I finally paid the bills and rolled our chubby buns out of there for a night of snow pant dancing!!!
PS. This restaurant also serves bottles of wine at SAQ prices plus $5! What a steal!
DOM’S CHOPPING BLOCK RATING:
Presentation: 4/5
Service: 4/5
Quality: 3/5
Atmosphere: 3.5/5
73 % for the love of cheese fondue!
PRICE: $7-$40


<>


Sundried Tomato and Herb Cheese Fondue 

Oriental Fondue with Chicken, Beef and Veggies